
Building the front splitter
Material you need:
- Cabinet corners x8 - $5 for pack of 20
- Aluminum angle iron, 4 feet x1 - $8
- Aluminum flat rod, 0.75 inches to an inch wide, 1/8th inch thick, 4 feet long x1 - $8
- 1/16 steel cable, 4 feet x1 - $0.50
- 2 cable crimps and 4 wire rope clips, the ones with a nut on them. - $5
- 5mm bolts long enough to clear the splitter with washers installed, and nylock nuts, and washers x14 - $20
- 2 bolts, out of the bolts that bolt up the factory undtray to the subframe - $1.50
- Alumalite or Alumacorr, 62 inches by 24 inches - $100-120 for a sheet of 4x8' from a local sign store.
Total cost: 148 - 168 dollars.
Tools:
- Jigsaw or Reciprating saw
- Drill with 1/4 drill bit and another bit that is smaller
- Tape measurer
- Straight edge
- Sharpie or other marker

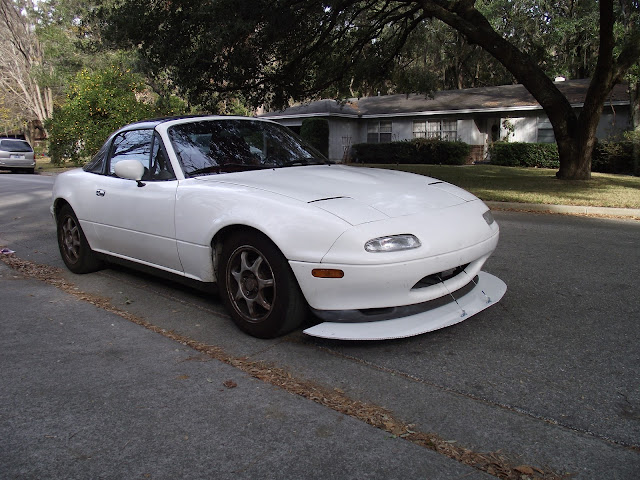
The splitter is pretty straightforward. Pictures tell a lot of the story so please look at the pictures as you read on. The splitter is mounted at 6 places, with 4 mounts doing the bulk of the work.
Steps
1. Cut the alumalite into appropriate size. It shold be cut to the length of the splitter and the width of the car. The splitter should extend under the bumper.
2. Remove the bumper, and trace out the outline on the alumalite. Mark center points and draw lines. Don't worry about marking the splitter up. You can remove the blue protective film and the marks will be gone. I left 5-6 inches in the centerpoint of where the lip would be, and left that much space all around. Draw the line so it will extend out to the width of the car. A tip is to take a tape measurer and put it against the front of the alumalite straight edge, and measure various spots. You will have to measure and mark horizontally first to make sure you are taking the measurements symmetrically. I marked every 6 inches out from the center point. Use the dots to trace a curve with your hand. Actually, while I drew on both sides, you only need to do it in one half.

3. Cut the splitter leading edge, on one side. Use the cut piece of alumalite (try not to mess it up) to trace and cut the other side. You also have to cut the rear corners out to make a mushroom shaped piece. Make sure it will not rub on your tires at full lock.
3. Find the two holes where the factory undertray mounts to. There are two on the subframe, right in front of the oil pan (might be behind, can't remember) that are in symmetrical locations. Measure from there to about 4 inches into where the splitter would begin. Cut the flat aluminum rod to that length. Drill two holes to the subframe mounting point and the other end down the centerline of the rod.
4. Using the rod as a template, mark the mounting holes on the alumalite and drill through it. The plastic core will gunk up the tip of the drill bit and give you a hard time before it drills through the aluminum sheet on the other side. After you drill through the first sheet and the plastic, clean out the drill bit tip. Be careful not to hurt your hands; unplug the drill when you do that.
5. There are two brackets where the radiator mounts to, that goes vertically. My radiator is repositioned, so it worked. With the stock mounting location, I am not sure if it will work. If it causes a problem, find another place to mount. It should be solid, stiff steel. You only need enough space to fit an open end wrench. Take the aluminum angle iron, use a clean end to press it up against the top of the radiator mount to find vertical and perpendicular. Draw a line, then mark two spots spaced as far apart as feasible and then drill a hole through the spots.
6. At this point, mount the splitter to the subframe using the two aluminum flat rods you drilled earlier. Be sure to use a washer to help distribute loads; the aluminum sheet gets pushed in easily. This should be enough to hold the splitter up where you can work on the other mounting points.

8. Take four of the cabinet corners and check if a 5mm bolt will go through it; it should be real tight. Some might not fit, if not, try another one. Take the corners and line it up to the angle iron, so that each one reaches outward from the angle iron in a 90 degree angle. Mark holes on the angle iron and the splitter, then drill. Mount using bolts and washers. These are the main braces. Three holes in each angle iron, and four holes total on the splitter. The nuts on the radiator support should be torqued tight.
 9. After that, look for tabs where the radiator inlet would be on the bumper. These are steel tabs that are horizontal. Carefully and slowly bend them down, about 100 degrees.
10. Reinstall the bumper. After that, about 1/2 inch behind the leading edge of the splitter, mark two lines 10 inches apart. Take 4 cabinet corners and line them up so that one end of the corner is linear to the airstream (that is front to back). Two corners should be used at each point. Use the corners to mark holes for drilling (4 holes total) and drill. Mount the corners also, using washers, bolts and nuts.
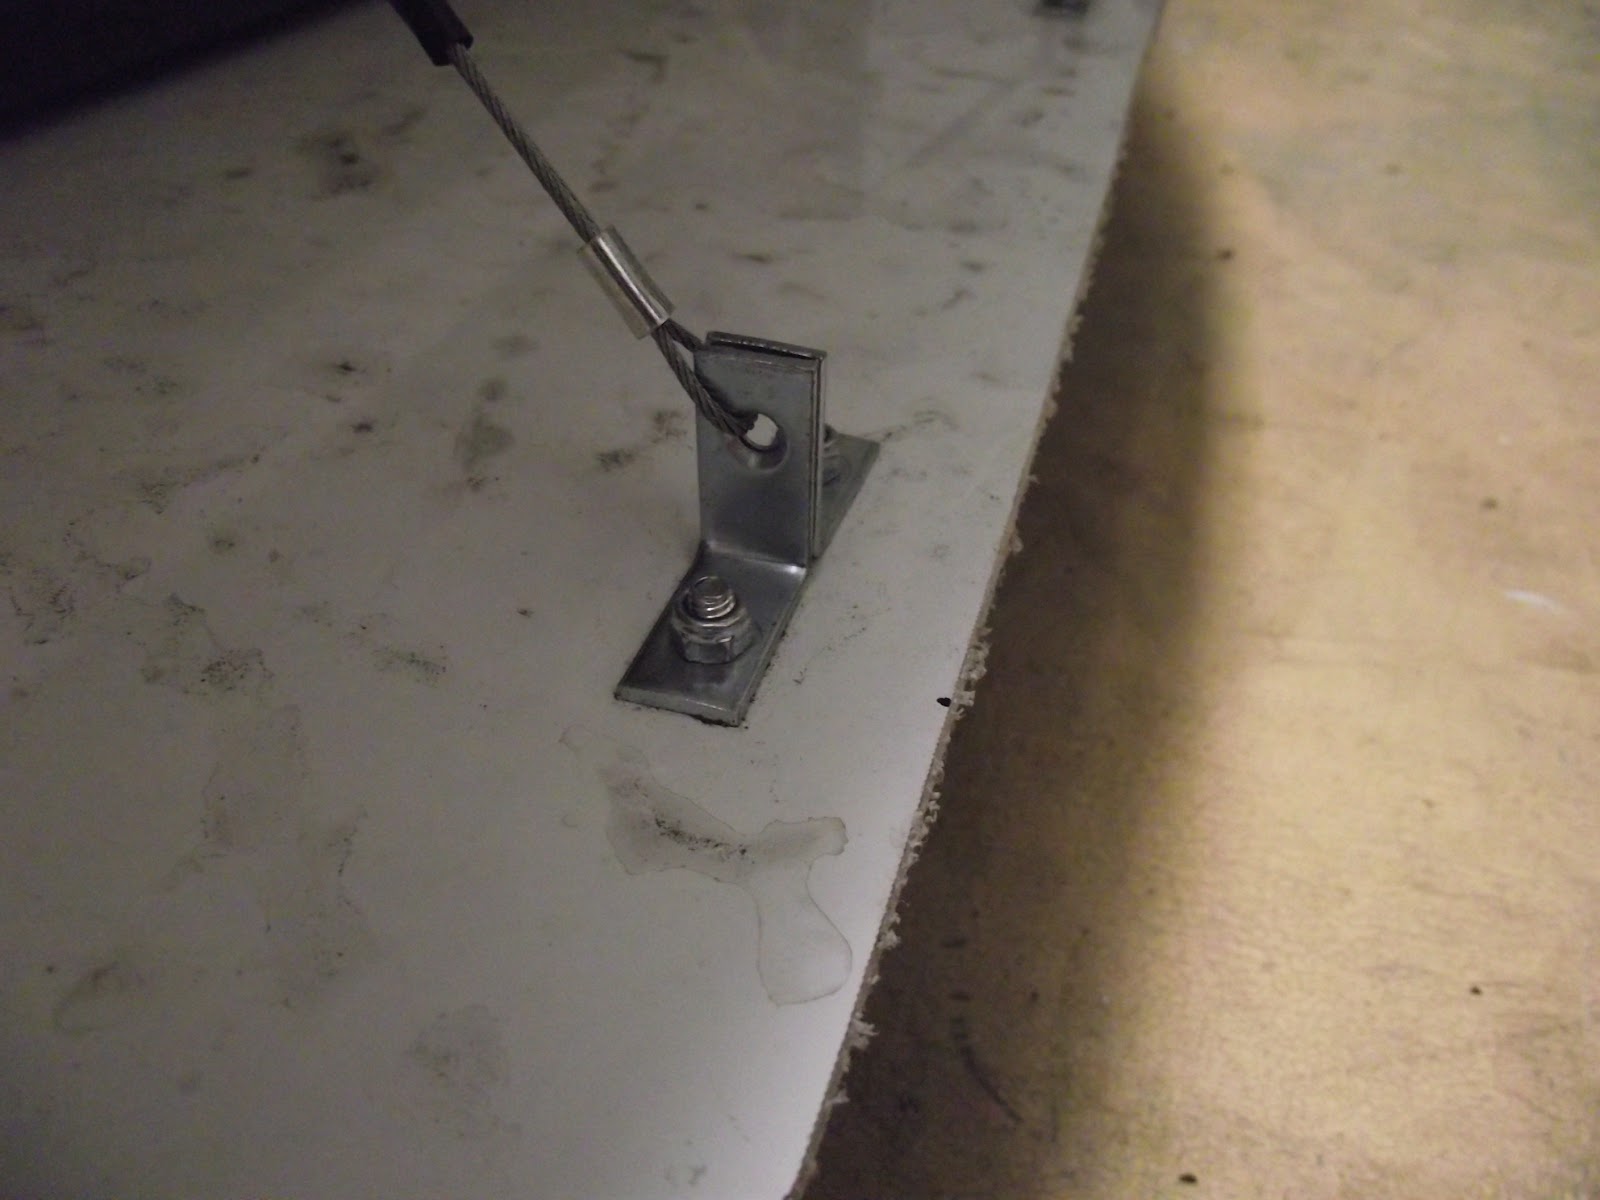
11. Take the steel cable and secure each end to the corners and the tabs. Tighten them real good, and crimp the bottom end and clip the top end. 2 clips for each cable end. Clips go on top because it disturbs less air, and you do need the clips because the cables will eventually stretch with prolonged use and the tabs may bend further. When each of them happen, you need to loosen the clips and tighten the cable some more.
Thats it! You can find edging for the alumalite at home depot or lowe's; they will be good for protecting the splitter when it scrapes, and give a more professional touch. I left mine exposed. Drive very slowly over bumps and go up driveways at an angle!
The most expensive part of the build is the alumalite itself. I had to buy a 4x8' piece. A 4x8 piece should leave you enough material to do an undertray, if you leave the exhaust pipe part exposed.


No comments:
Post a Comment