Penny-pinching car geek's guide to racing, track days, and car build. DIY projects, product reviews, and interviews.
Showing posts with label front splitter. Show all posts

Saturday, January 8, 2011

Track Day Report - Gainesville Test Course - 01/08/11


What a day! After some mishaps early on in the morning, I have gathered some good results.  I got there late, at around 9:00am.  Fortunately they hadn't started the drivers meeting or anything yet.


Conditions: 52 degrees at 10am, 65 degrees at 12:30pm.


  • Changes from previous event:
  • Tires a bit more worn
  • Hi-Kick Racing design front splitter and rear spoiler (Both 7")
  • Airtab® Vortex Generators
  • Passenger seat was still removed


Session 1
Spoiler at the third highest setting and tire pressures at my 36f and 31r, I went out.  Two bad things happened here.  I a lot of oversteer due to lack of rear downforce, and I was putting my brakes through hell.  Months before, I had replaced my Hawk Black pads to Axxis ULT pads, which were rated "track worthy."  The brakes got spongy after a lap or two, and I could smell fumes from outside the car.  I did a few more laps and I pit back in.


Fastest Time: No laptimes were recorded because I messed up the settings on my laptimer.


I went home and changed the pads back to my worn down Hawk Blacks in a hurry. They had about 20% of life left in them.  Took me an hour to drive, change, and drive back.  I arrived at noon, and asked Grant to drive my car.


Session 2
I adjusted the spoiler to its second highest setting.  No other changes were made.  I went right back out and did a few more laps than the last session.  Handling balance was a bit better, but I was still loose around transitions and kept scrubbing off speed with the end kicking out.  Two problematic areas were the transition between turns 2 and 3, corner exit at turn 4+5, and after the second apex on the chicane at turn 7.  I decided to pit in after a short cool-down run before I boiled my brake fluid.


Fastest Time: 1:02.8
Average Time: 1:03.3


Session 3 - Vortex Generators (Airtabs®) 
I taped four vortex generators in the middle of the rear edge of my roof.  Both had the same laptimes.  Its hard to quantify the exact effect but comparing the best sector times between the VG run and the non-VG run (session 2) in the constant radius turns (turns 2 and 3), the VG installed car seems have slightly higher average lateral acceleration.  My driving in this session with the VGs is also much more consistent.  Furthermore, the car felt more stable.  Objectively speaking, it could be just because I was more used to the car, but I really think it was the VGs that made the difference.  I didn't adjust my driving very much in this run and I drove much cleaner.  I will make a separate post about my experiences with the Airtab® vortex generators.


Fastest Time: 1:02.8
Average Time: 1:03


Grant's run
Grant driving my car
Because I missed out on a lot of track time changing my brakes, I asked Grant to do a short stint.  I dropped the rear tire pressures about 1.5 lbs.  He says he can go faster with a few more laps and even faster with a better driving position.  Grant barely fits in my car.
Benchmark time was 0.4 seconds faster today than his last record of 1:01.8.  His time was 1:01.46


Session 4
With VGs installed, spoiler at second highest setting (man, I need to number the positions), and rear pressures the same as when grant drove the car, I did a 1:02.1. Woohoo! Personal record.  Some of its due to better driving, some of it is due to lower temperatures (should be about 5 degrees lower than my previous record) and some of it is due to the aero mods I put on my car.  The tires have been aging each event, but I guess the changes to the car and driving made up for it.


Driving Notes
Even if I dive-bomb into the chicanes, turning in early and hitting the initial right-side apex allows me to bleed off speed and properly later-apex the left side apex.  Mimicking grant's driving, I accelerated off of that apex into turn 9, but I have to make sure I am positioned correctly on the far left side of the track in order to make it into turn 9 without coming out too wide.  Smooth inputs with steering and throttle are critical in order to not oversteer in turn 9 entry.  This is even more applicable because my car is more neutral.


With aero mods, I can get on the gas way earlier than usual; carefully dialing in throttle allows very good acceleration off of turn 9. Trail-braking into turn 1 and 4 works very well also.


Conclusions
I can say with good definiteness that the front and rear aero mods and the Airtabs® had a net positive effect on the performance of the car.  Top speed of today was 1.5 miles higher than my past top speed, even with a lot of fuel in the car.  Even if I account for the cooler temperatures, this is pretty good.  This means that putting down more power with the increased aerodynamic grip on the exit of turn 9 overcame the drag penalties of my splitter. Vmax: 75mph!


Some more pictures from the event. Pictures seem to be of all Mazdas today!


By the way, I attended the 24 hours of Lemons in PBIR as a crew member. I'm still working on the report; stay tuned!

Friday, January 7, 2011

Aerodynamic Modifications to the car

The LOHP Miata (AKA Brokecore car) received aero mods this winter. It was a long overdue project that I finally got around commencing. I haven't track tested this yet, but I will make an update on it after my track event this weekend.

So what did I make? I made a splitter and spoiler on my car. I went through two spoiler designs because of aesthetic reasons. Ironically, the uglier one worked better. I still have that one if anyone wants it, but your car will look like the Corellian Corvette from Star Wars.

I tested them on the freeway up to 80mph, which is about 7mph faster than my maximum velocity at my home track. They held up fine. The splitter scrapes every once in a while when I drive around town, and the spoiler flutters a bit around the edges but it won't affect the durability at all.

Here is the picture of the modified car:


Links

Rear Spoiler build
Test Results

Laptime improvements will be at the next track report.

Aero Mod: Splitter


Building the front splitter

Material you need:
  • Cabinet corners x8 - $5 for pack of 20
  • Aluminum angle iron, 4 feet x1 - $8
  • Aluminum flat rod, 0.75 inches to an inch wide, 1/8th inch thick, 4 feet long x1 - $8
  • 1/16 steel cable, 4 feet x1 - $0.50
  • 2 cable crimps and 4 wire rope clips, the ones with a nut on them. - $5
  • 5mm bolts long enough to clear the splitter with washers installed, and nylock nuts, and washers x14 - $20
  • 2 bolts, out of the bolts that bolt up the factory undtray to the subframe - $1.50
  • Alumalite or Alumacorr, 62 inches by 24 inches - $100-120 for a sheet of 4x8' from a local sign store.
Total cost: 148 - 168 dollars.

Tools:
  • Jigsaw or Reciprating saw
  • Drill with 1/4 drill bit and another bit that is smaller
  • Tape measurer
  • Straight edge
  • Sharpie or other marker


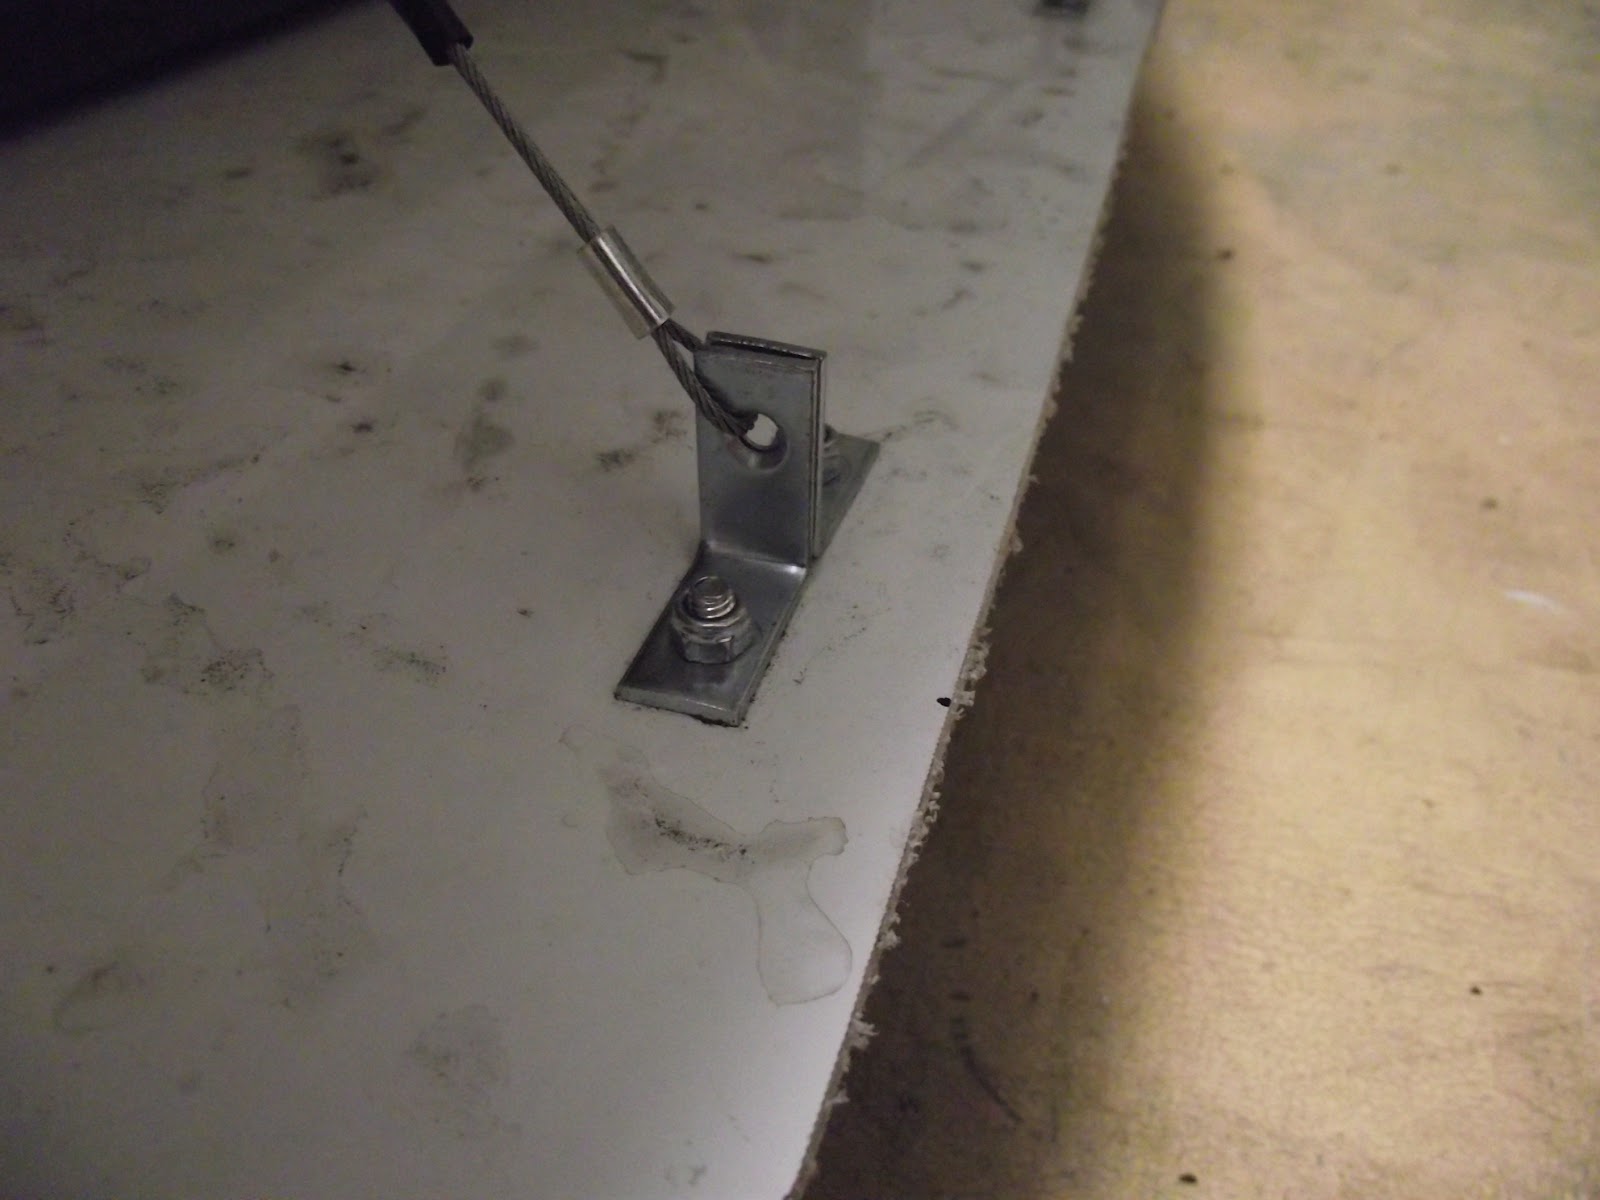
The splitter is pretty straightforward. Pictures tell a lot of the story so please look at the pictures as you read on. The splitter is mounted at 6 places, with 4 mounts doing the bulk of the work.

Steps
1. Cut the alumalite into appropriate size. It shold be cut to the length of the splitter and the width of the car. The splitter should extend under the bumper.

2. Remove the bumper, and trace out the outline on the alumalite. Mark center points and draw lines. Don't worry about marking the splitter up. You can remove the blue protective film and the marks will be gone. I left 5-6 inches in the centerpoint of where the lip would be, and left that much space all around. Draw the line so it will extend out to the width of the car. A tip is to take a tape measurer and put it against the front of the alumalite straight edge, and measure various spots. You will have to measure and mark horizontally first to make sure you are taking the measurements symmetrically. I marked every 6 inches out from the center point. Use the dots to trace a curve with your hand. Actually, while I drew on both sides, you only need to do it in one half.

3. Cut the splitter leading edge, on one side. Use the cut piece of alumalite (try not to mess it up) to trace and cut the other side. You also have to cut the rear corners out to make a mushroom shaped piece. Make sure it will not rub on your tires at full lock.

3. Find the two holes where the factory undertray mounts to. There are two on the subframe, right in front of the oil pan (might be behind, can't remember) that are in symmetrical locations. Measure from there to about 4 inches into where the splitter would begin. Cut the flat aluminum rod to that length. Drill two holes to the subframe mounting point and the other end down the centerline of the rod.

4. Using the rod as a template, mark the mounting holes on the alumalite and drill through it. The plastic core will gunk up the tip of the drill bit and give you a hard time before it drills through the aluminum sheet on the other side. After you drill through the first sheet and the plastic, clean out the drill bit tip. Be careful not to hurt your hands; unplug the drill when you do that.

5. There are two brackets where the radiator mounts to, that goes vertically. My radiator is repositioned, so it worked. With the stock mounting location, I am not sure if it will work. If it causes a problem, find another place to mount. It should be solid, stiff steel. You only need enough space to fit an open end wrench. Take the aluminum angle iron, use a clean end to press it up against the top of the radiator mount to find vertical and perpendicular. Draw a line, then mark two spots spaced as far apart as feasible and then drill a hole through the spots.

6. At this point, mount the splitter to the subframe using the two aluminum flat rods you drilled earlier. Be sure to use a washer to help distribute loads; the aluminum sheet gets pushed in easily. This should be enough to hold the splitter up where you can work on the other mounting points.

7. Sit in front of the car, and measure how long the angle iron needs to be from the radiator mount to the splitter. I used my knees to hold up the splitter a bit to make sure it is horizontal to the ground. Using the above holes on the radiator mount as a template, drill holes into the aluminum angle on one plane. Mount the angle iron. How you mount it is irellevant, just make sure that both angle irons are mounted the same way.

8. Take four of the cabinet corners and check if a 5mm bolt will go through it; it should be real tight. Some might not fit, if not, try another one. Take the corners and line it up to the angle iron, so that each one reaches outward from the angle iron in a 90 degree angle. Mark holes on the angle iron and the splitter, then drill. Mount using bolts and washers. These are the main braces. Three holes in each angle iron, and four holes total on the splitter. The nuts on the radiator support should be torqued tight.

9. After that, look for tabs where the radiator inlet would be on the bumper. These are steel tabs that are horizontal. Carefully and slowly bend them down, about 100 degrees.

10. Reinstall the bumper. After that, about 1/2 inch behind the leading edge of the splitter, mark two lines 10 inches apart. Take 4 cabinet corners and line them up so that one end of the corner is linear to the airstream (that is front to back). Two corners should be used at each point. Use the corners to mark holes for drilling (4 holes total) and drill. Mount the corners also, using washers, bolts and nuts.


11. Take the steel cable and secure each end to the corners and the tabs. Tighten them real good, and crimp the bottom end and clip the top end. 2 clips for each cable end. Clips go on top because it disturbs less air, and you do need the clips because the cables will eventually stretch with prolonged use and the tabs may bend further. When each of them happen, you need to loosen the clips and tighten the cable some more.

Thats it! You can find edging for the alumalite at home depot or lowe's; they will be good for protecting the splitter when it scrapes, and give a more professional touch. I left mine exposed. Drive very slowly over bumps and go up driveways at an angle!

The most expensive part of the build is the alumalite itself. I had to buy a 4x8' piece. A 4x8 piece should leave you enough material to do an undertray, if you leave the exhaust pipe part exposed.